Sunday, June 27, 2010

Quick poses with toned paper


The following drawings where done on white paper toned with charcoal powder. I saw a fellow student and amazing draftsman, Isaac Pelepko, doing this one day and decided to give it a shot. I found it immensely helpful. Working with toned paper forces you to erase as much as you draw, which really forces you to see the lights on a figure (i.e. the parts of an object that light hits directly, as opposed to the shadows, which the light doesn't reach).


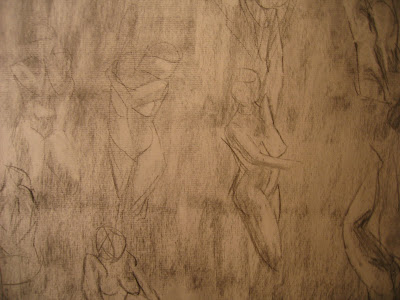
I thought I was being clever by establishing my lights in some sort of a hatching system. Now i just find it distracting.
I remember drawing this one and hating it at the time. In hindsight, I don't dislike it nearly as much. Its very rough which may be the reason I like (and dislike) it.

These don't read very well but whatever.

This is my best one, I think. Which is funny, because I don't really remember drawing it at the time.

I only worked this way for about a week but learned soo much. Last week I went back to trying it and will post my results soon. Now that I know more about modeling factors, I'll hopefully be more aware of the midtones!

I'm linking to Isaac Pelepko's website here. Just a disclaimer; Isaac's stuff might be a bit racy for some but its also very very funny.
This was done sometime in November or December at the Art Student's league? It was a 20 minute pose and I got very lucky with it I think. Mostly because it reads somewhat as being three dimensional and at the time, I didn't really know how to break the figure down in terms of its modeling factors, or rather, its varying parts that make it look like an object existing in space (e.g. the shadows, half tones, lights, reflected light etc). I'm certain that if it was a 40 minute pose I would have ruined it. Hell, I probably would have ruin it even now if I tried to make it a "finished" drawing!
A 1 or 2 minute pose that was very fun to draw.
I'm proud of this one because, unlike most of my stuff, I had a clear idea from the beginning on how to execute the drawing. I very roughly drew in the basic mass of the figure and afterwards went in and made small adjustments that (hopefully) made it look more specific and "real". For example, I first saw the torso and ribcage as a sphere or some kind, and only afterwards went in with harder lines and realized that there was foreshortening under her right arm ( sort of like a triangle of negative space beginning under her arm pit and extending near the side of her breast).
Looking at this drawing and trying to comment on different parts of her body is making me realize that I really need to study anatomy! Frank Porcu's anatomy lectures here I come!

Work from the last few months


So I have a few photos I've taken of my work over the last few months. Most of these are very quick poses, done usually in 1 to 5 minute periods. I'll take more photos of my paintings and post them soon. All comments and critics welcome.

These are two quick poses I did a while ago, probably back in August or September of last year at Spring Street Studio in Manhattan. They're two of my favorite, not because they are "correct" (Something goofy is going on with the rib cage of the figure on the right, for example). Far from it. But I like them because they are some of the first drawings where I attempted to see the figure completely in terms of abstract, geometrical shapes. It's a great training exercise and can really help at getting the "gesture" of a pose.

Pizza to art

Okay so I've decided to transform this blog from one about pizza to one about making art. I'm going to post the sketches and paintings I've been making at the Art Student's League in the hopes of somehow keeping a visual record of my progress. I'm going to try to post everything I do, whether I like it or not. Hopefully, I'll still do the occasional pizza review or talk about different ideas have for pizzas. If anyone has any pizza suggests or comments, please keep posting them! Also, anything to do with art is good, too.

thanks!